Add a Network Element to a Design
This guide explains how to add a node to an existing design. The example below uses an IP Router (Ethernet Ports) node.
Make sure you already have a design loaded in the Topology View. If not, start with Create a network design.
Step 1: Open the Add Node Menu
- In the Topology View, right-click anywhere on the map canvas.
- In the context menu, click the Node option.
- Select Add node of type IP Router (Ethernet ports) from the list.
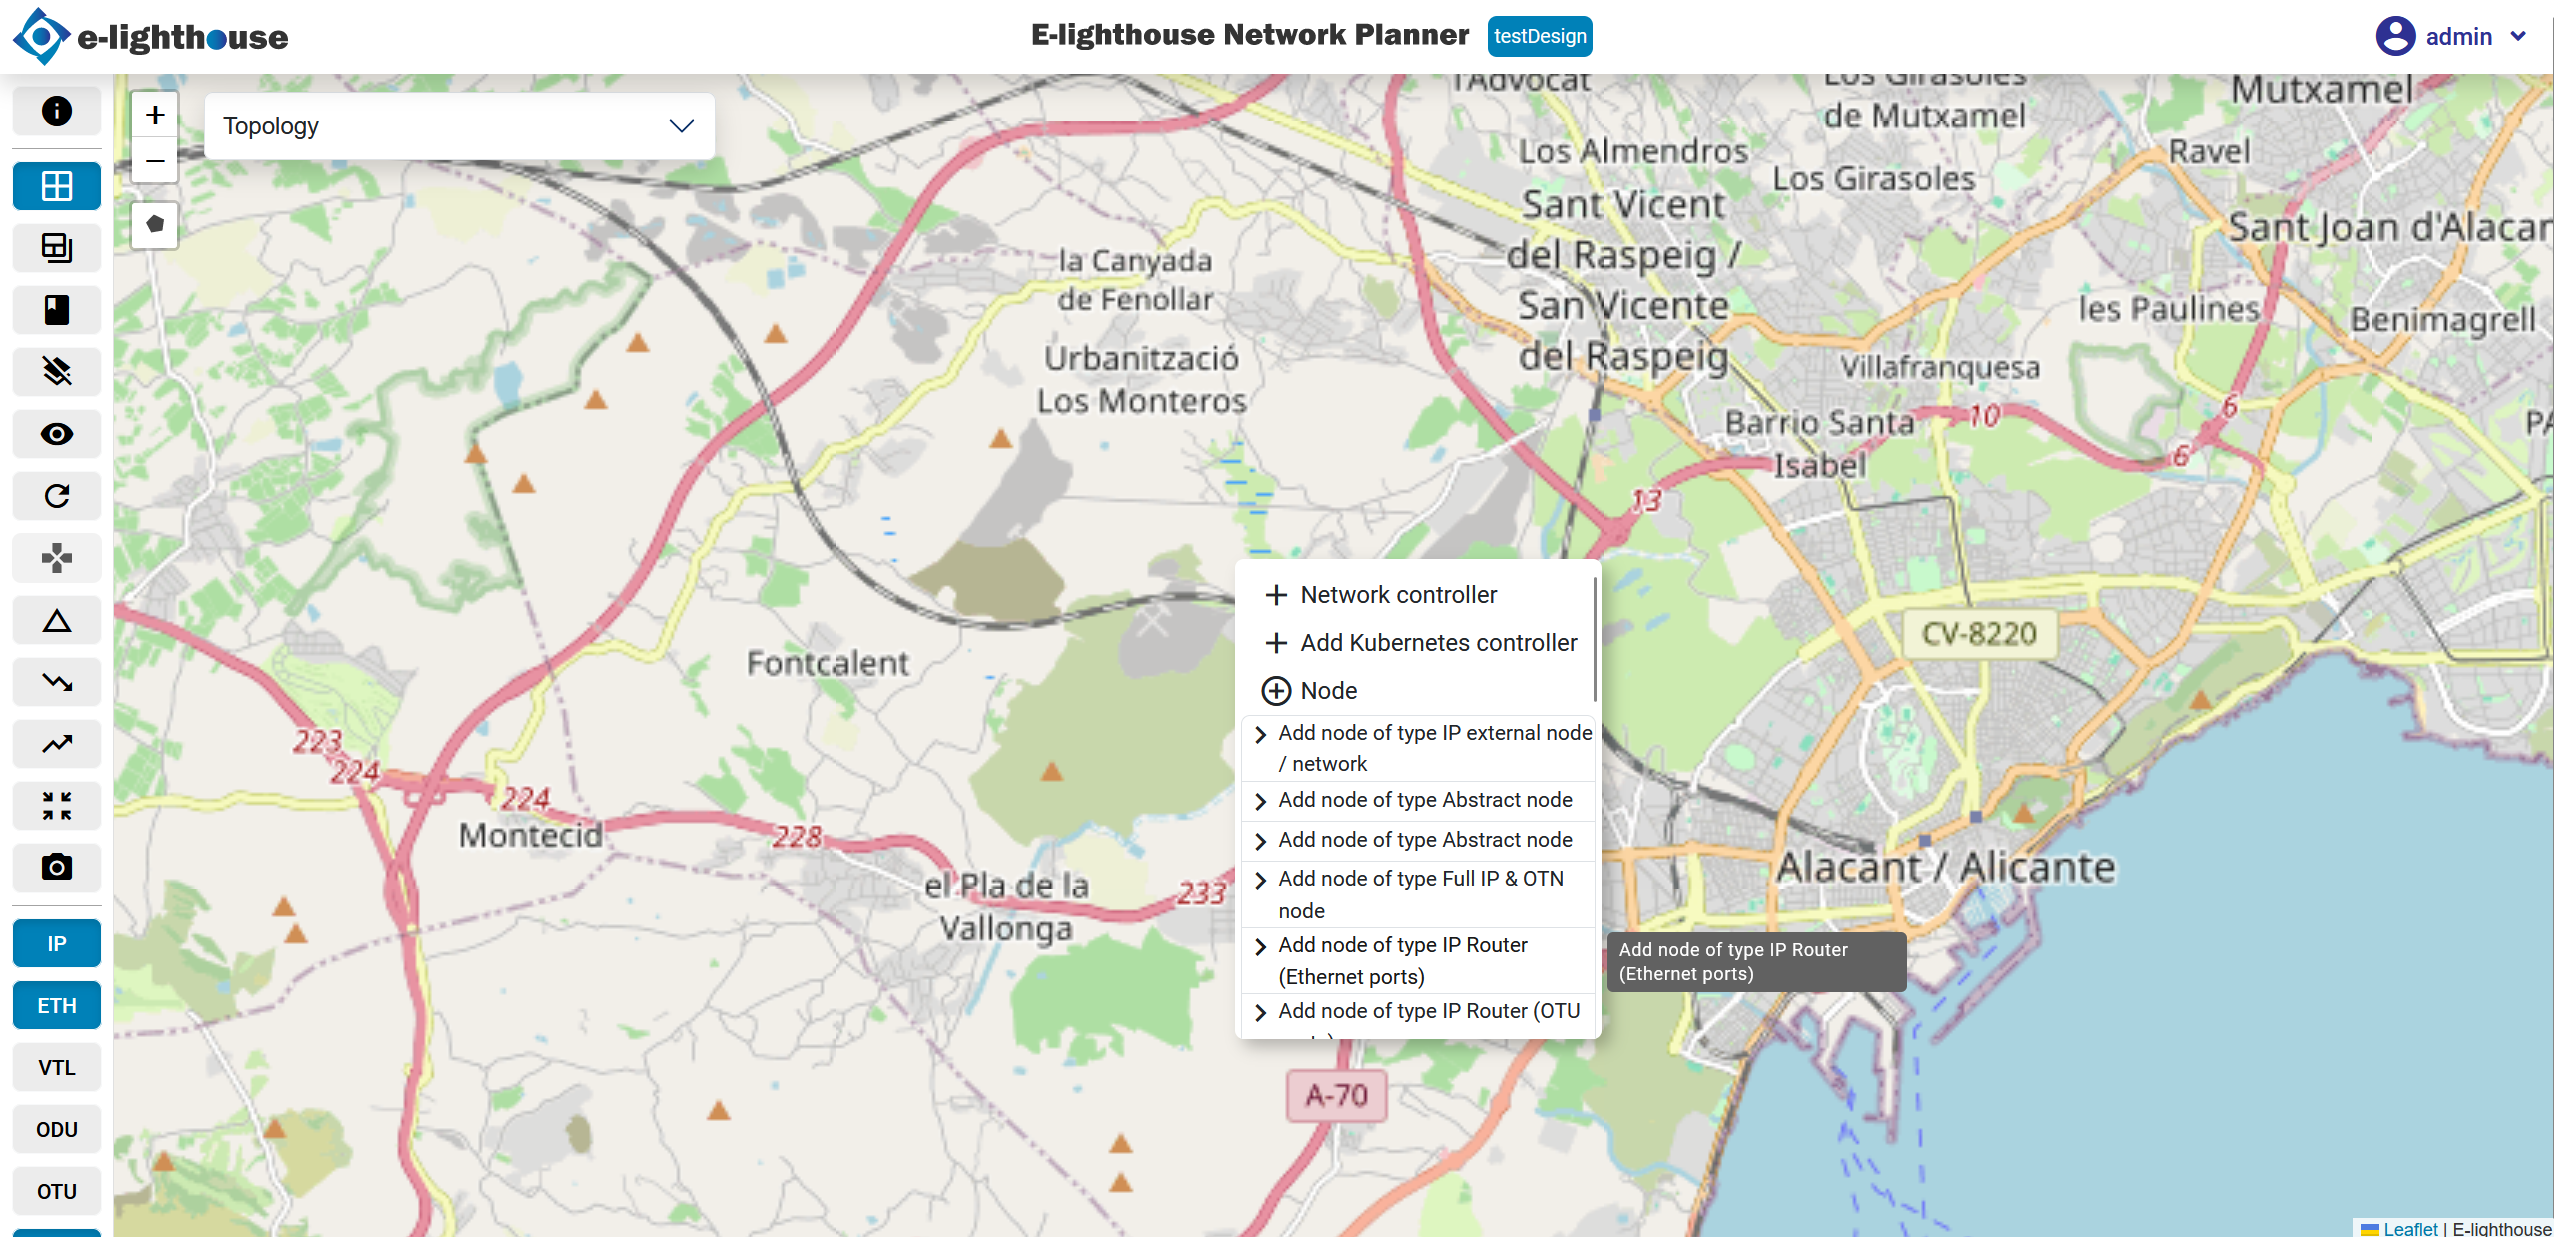
Step 2: Complete the Node Form
Once you select the node type, a configuration panel will open.
- Filter the node types if necessary to quickly find IP Router.
- Fill in the required node properties such as:
- Node name
- Technology type
- Location, if applicable
Then confirm the creation to add the node to the topology.
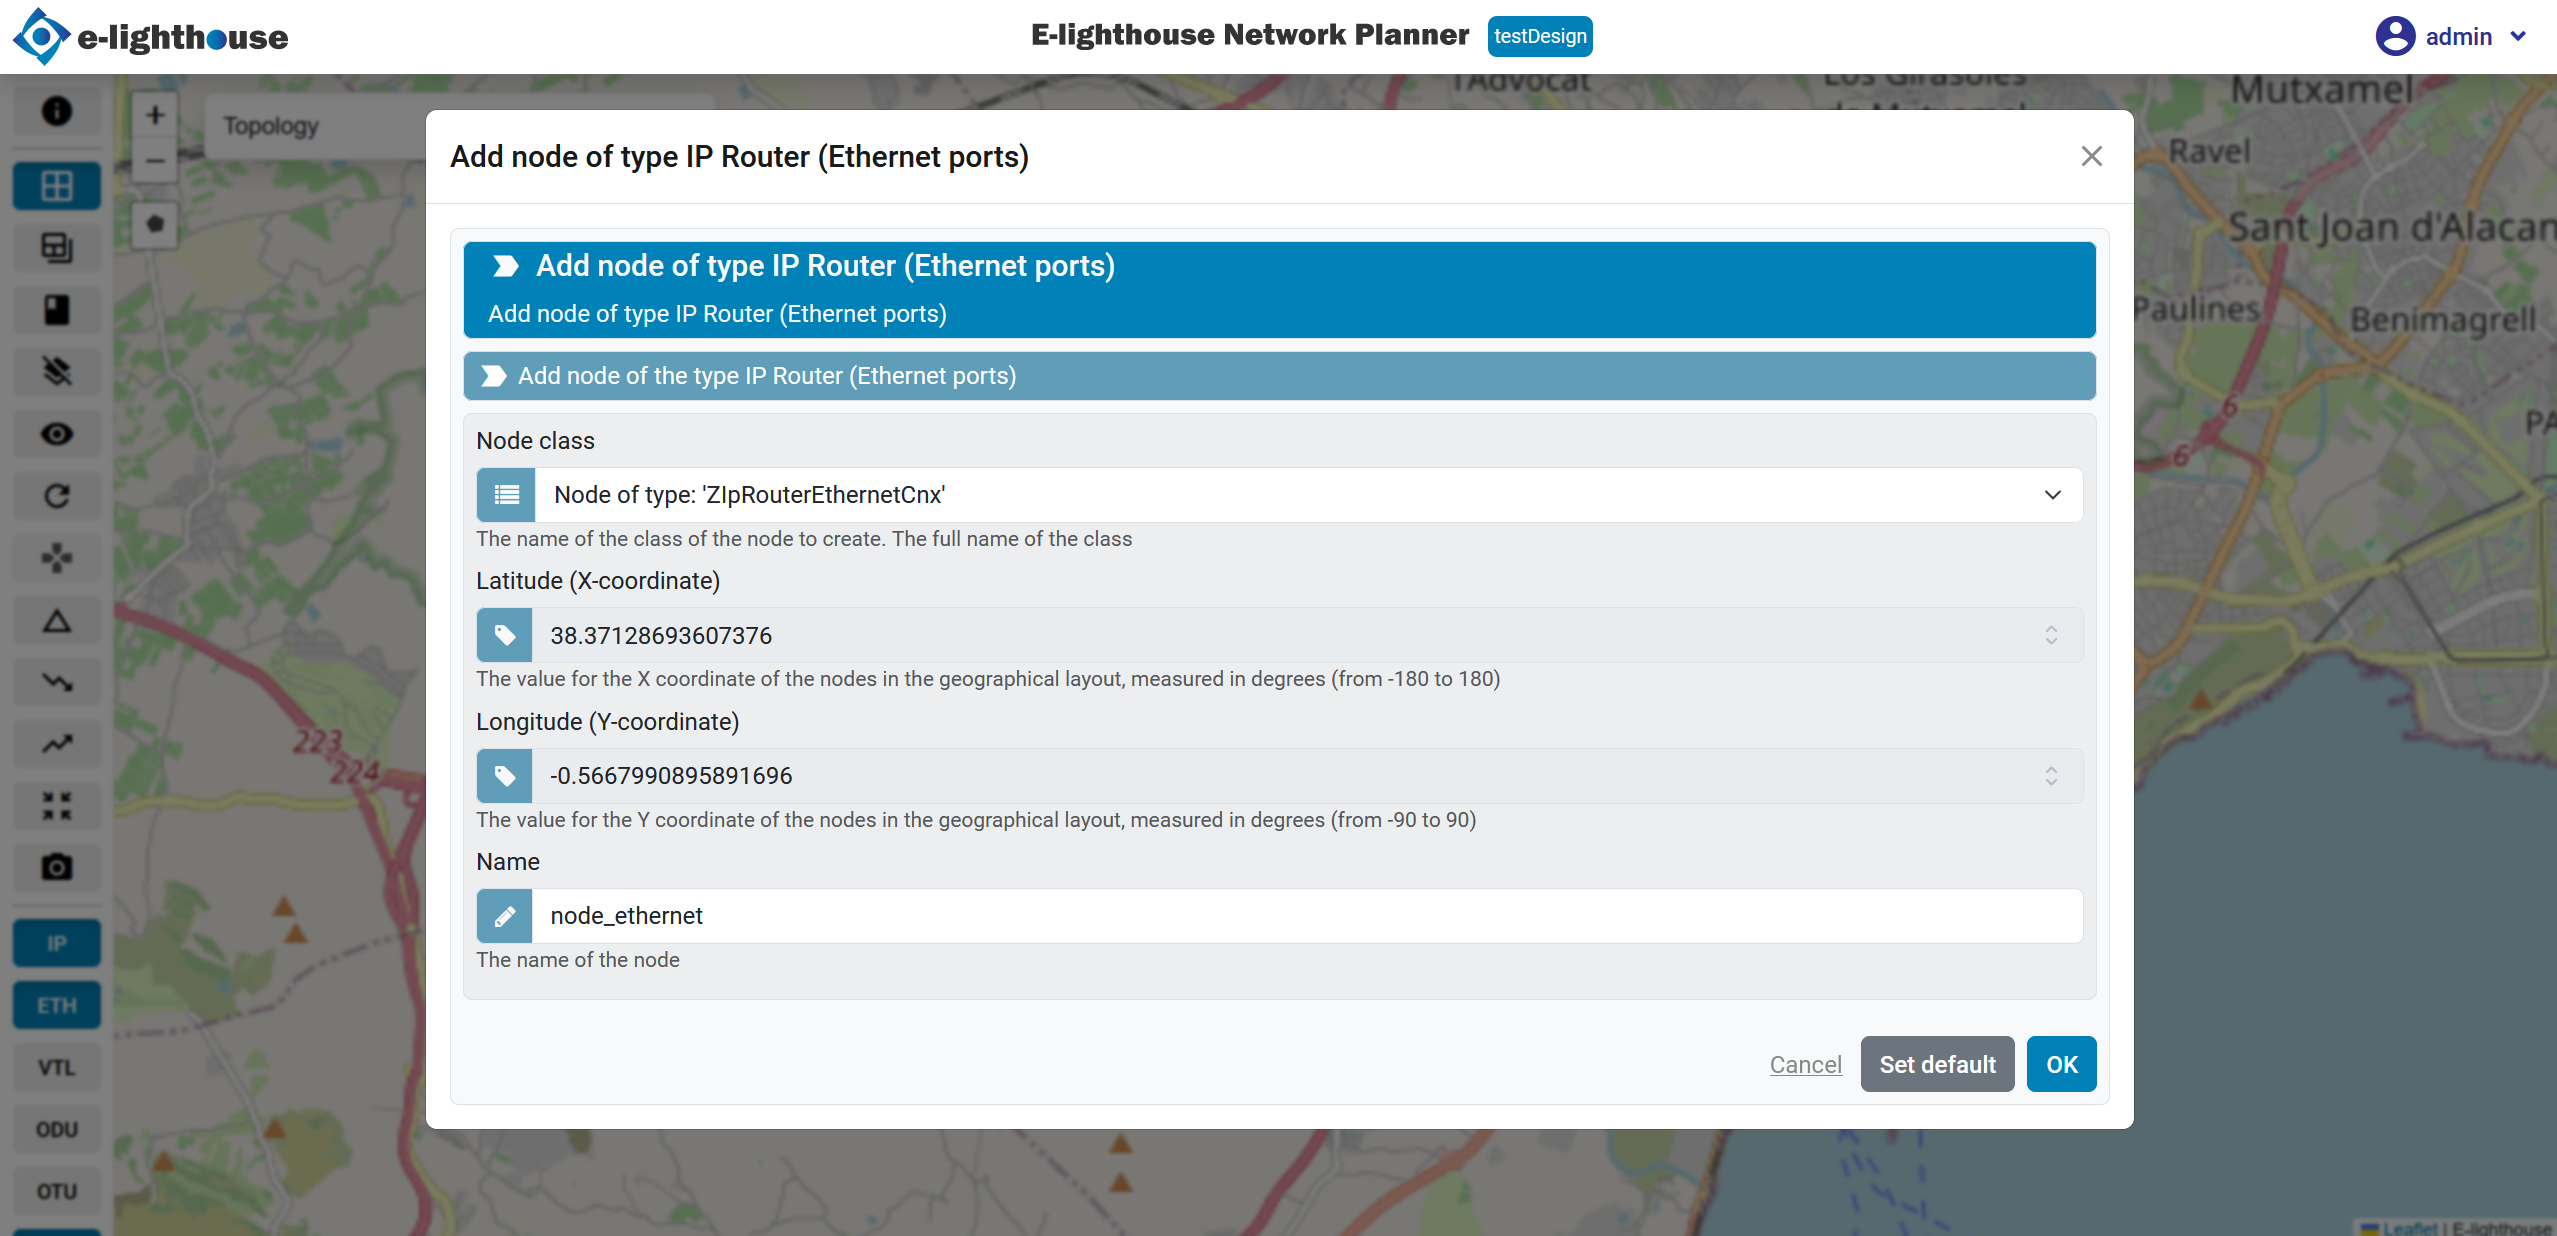
Step 3: Review the Node in the Control Window
After adding the node, you can view and manage it using the Control Window.
- Open the Control Window from the top menu or use the shortcut
C + W. - Navigate to the Network View & Analysis → Nodes section.
- Open the IP Router table to see the newly added node and its details.
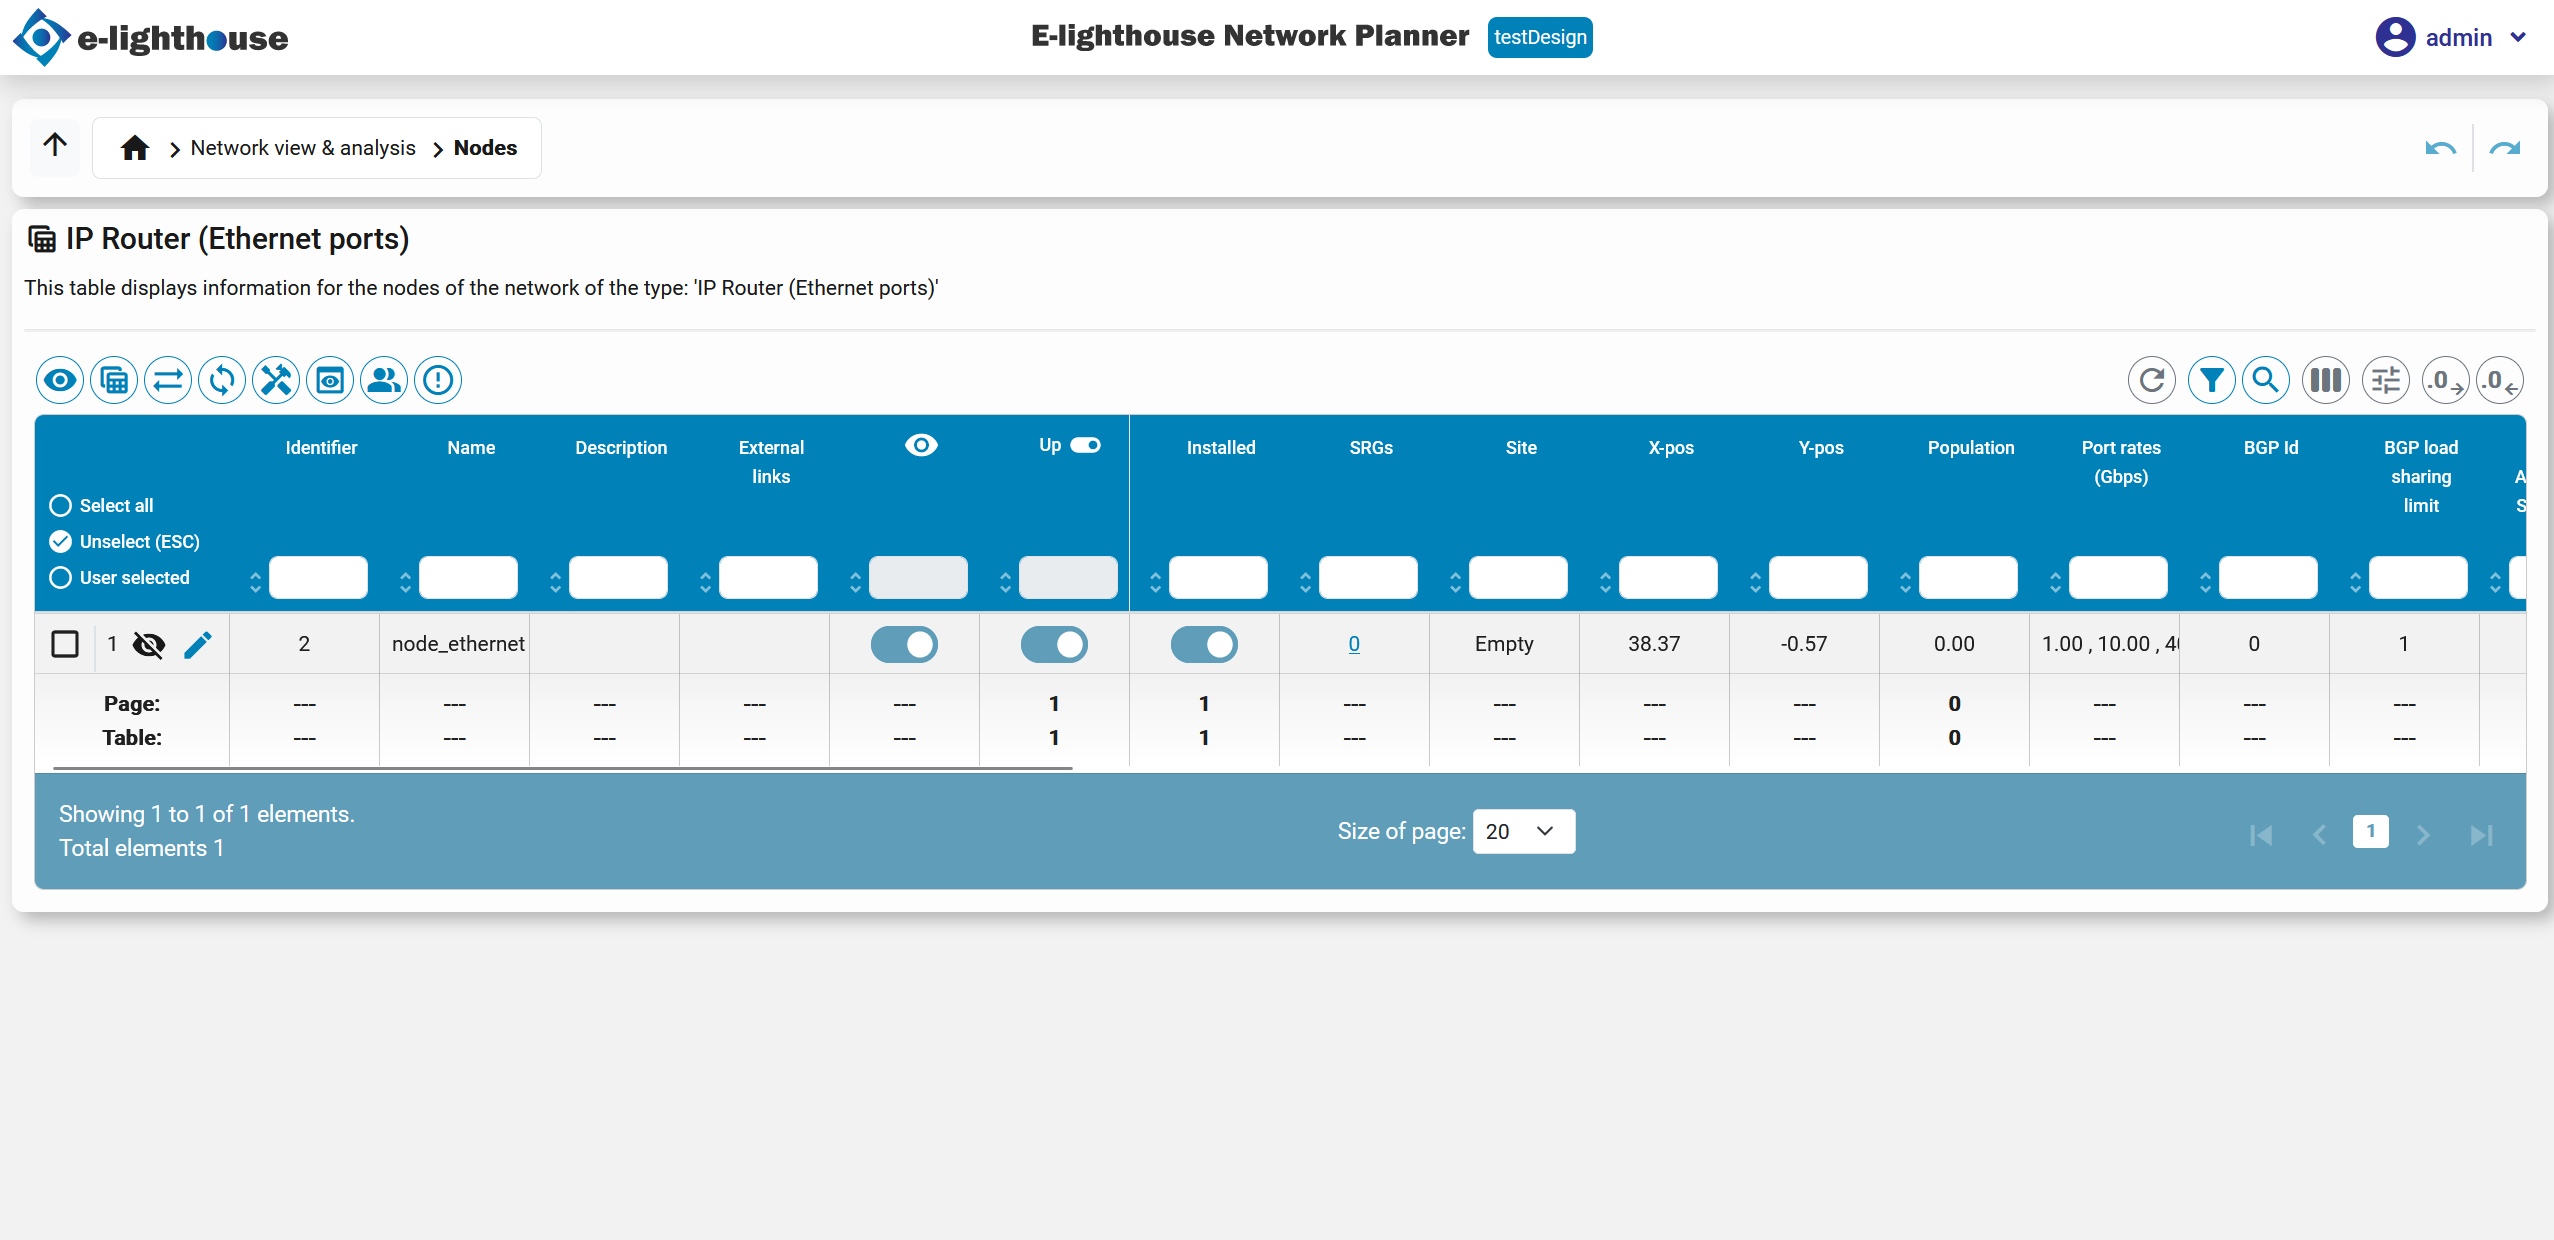
Additional Tips
- Nodes that are not yet connected may be hidden on the map. Disable Hide non-connected nodes to reveal them.
- If you are not sure the node was created, verify it in the Control Window table.
- Use a clear naming convention from the start so later filtering is easier.
You can continue editing node properties from the Control Window or use the right-click context menu in the Topology View.
Recommended Next Step
After creating the node, you can:
- connect it to other nodes with links
- inspect it in the Control Window
- add a network controller if your workflow includes controller-managed domains